NinjaFirewall is a powerful web application firewall. When implemented in a production environment, it does not take more than a few hours before its log starts showing several blocked threats.
But because each site is different, it is possible that its default configuration may also wrongly block some legitimate visitors. To prevent this, it has a very helpful option: the Debugging Mode.
When this mode is enabled, NinjaFirewall will silently run in the background without blocking anyone, but it will keep writing all potential threats to the firewall log as usual.
We recommend to run it in Debugging Mode for at least 24 hours after installing it on a new site and then to keep an eye on the firewall log during that time. If you notice a false positive in the log, you can simply use NinjaFirewall Rules Editor to disable the security rule that was wrongly triggered.
Enabling NinjaFirewall’s debug mode
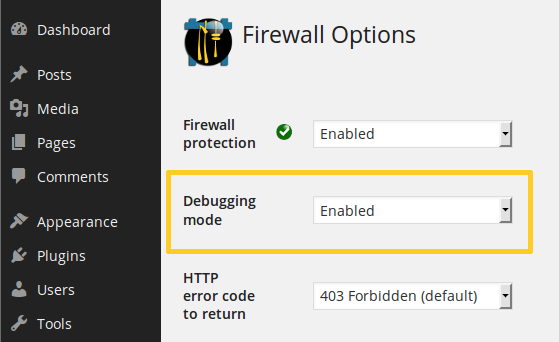
In NinjaFirewall WP & WP+ Edition, it can be enabled from the NinjaFirewall > Firewall Options > Debugging mode menu:
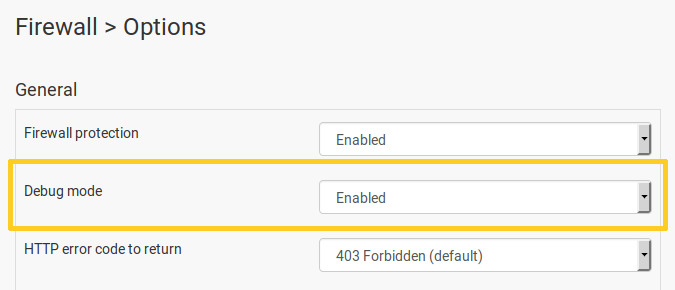
In NinjaFirewall Pro & Pro+ Edition, it can be enabled from the Firewall > Options > Debug mode menu:
Checking the firewall log
The sample below show two threats (NULL byte attack and SQL injection attempt) written to the log while NinjaFirewall was in Debug Mode:
       DATE         INCIDENT  LEVEL     RULE     IP       REQUEST
17/Mar/15 00:21:24  #0000000  DEBUG_ON     2  172.16.0.1  GET /index.php - ASCII character 0x00 (NULL byte) - [REQUEST_URI = /?test=hack%00]
17/Mar/15 00:32:30  #0000000  DEBUG_ON   214  172.16.0.1  GET /sites/wordpress/index.php - SQL injection (alter/create/drop) - [GET:test = 1;DROP TABLE users]
In Debug Mode, the INCIDENT column will always display “#0000000” and the LEVEL one, “DEBUG_ON”.
The ID of the built-in security rule that detected the threat is indicated in the corresponding RULE column. If a rule blocks legitimate visitors, enter that ID in the Rules Editor to disable it.