In order to migrate your site with NinjaFirewall installed, it is important to follow those steps:
WP/WP+ Edition
1 . Log in to your WordPress admin dashboard.
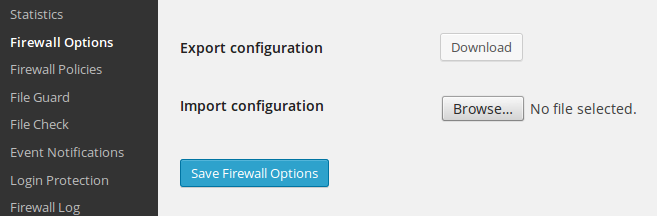
2 . Click on NinjaFirewall > Firewall Options > Download to export your configuration:
Note: the File Check configuration will not be exported, because the directories path on the new server will not match the current snapshot.
3 . Deactivate and uninstall NinjaFirewall from the WordPress admin dashboard.
4 . Migrate your blog/site.
5 . Reinstall NinjaFirewall.
6 . Click on NinjaFirewall > Firewall Options to import its configuration.
7 . Reconfigure File Check to create a new snapshot of the server (optional).
Pro/Pro+ Edition
1 . Comment out the NinjaFirewall auto_prepend_file directive in your PHP INI or .htaccess file to disable the firewall.
2 . Migrate your site and NinjaFirewall.
3 . Edit your PHP INI or .htaccess file to adjust the path to the firewall.php script and then, uncomment the auto_prepend_file directive to re-enable the firewall.
4 . Log in to NinjaFirewall’s administration console, click on Firewall > Policies, scroll down to the bottom of the page and click on the Save Changes button. That will adjust some variables (e.g., document_root etc) to match the new site.
Do not forget to test your site or to put NinjaFirewall into Debugging Mode after the migration to ensure everything is working well.