Last revision: July 14, 2021
NinjaScanner should work out-of-the-box in most cases, but some hosting restrictions, e.g., server resource limits or security policies, may prevent it from working as expected. We will see in this article the most common issues a user may experience.
NinjaScanner Log
Whenever you’re having an issue while running NinjaScanner, always check its log:
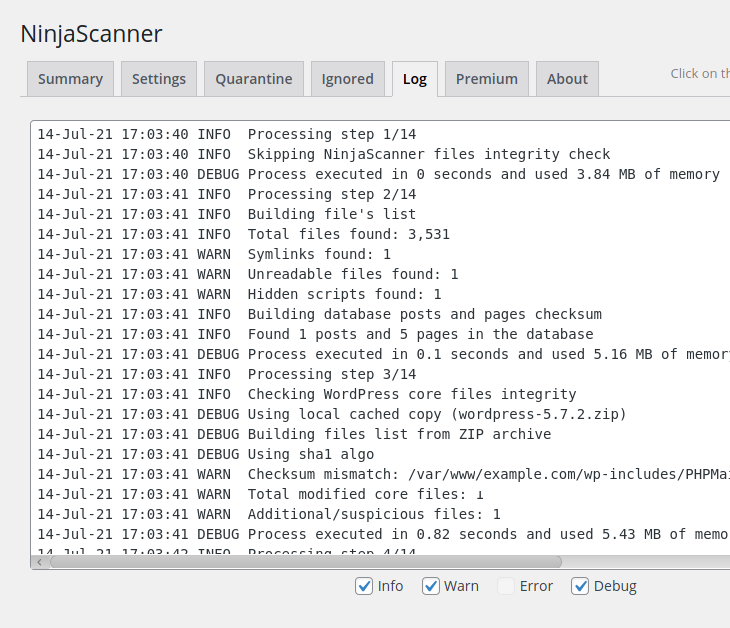
Click on the “Log” tab and check the “Debug” and, if applicable, the “Error” checkboxes below the log. Most errors, including PHP errors, will be written here.
The scanning process does not start
As soon as you attempt to start the scan, it displays the following error message:
Error: Cannot start the scan. More details may be available in the scanner log. If this error persists, select a different value for the “Settings > Advanced Users Settings > Scanning process > Fork process” option.‘
Click on NinjaScanner “Log” tab to check if there is more details in its log. Then, go to “Settings > Advanced Users Settings > Scanning process” and try to change the “Fork process” method:

Save the new settings and try again.
If the scan still refuses to start, check if you do not have an application (security plugin, WAF, CDN), a hosting restriction or some rewrite rules in your .htaccess that prevent NinjaScanner to access the /wp-cron.php and/or /wp-admin/admin-ajax.php. If you are unsure about that, try to access those two scripts from your browser (make sure to log out of WordPress before doing so):
- http://YOUR_BLOG/wp-cron.php
- http://YOUR_BLOG/wp-admin/admin-ajax.php
The former should return a blank page, the latter a blank page with a 0. Both should return a 200 OK HTTP code anyway.
The scanning process does not terminate
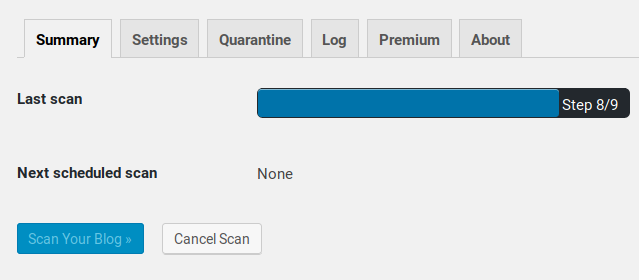
NinjaScanner scanning process should take between one to several minutes to perform, depending on the number of files. If if takes more than 10 or 15 minutes, it is likely that the process hung, crashed or was killed.
The scanning process starts but hangs, usually when reaching the 8th or 9th step:
Click on NinjaScanner “Log” tab to check if there is more details in the log about the error. Don’t forget to check the “Debug” checkbox below the log’s textarea to increase its verboseness.
1. PHP maximum execution time
It could be due to the PHP maximum execution time limit. Although NinjaScanner will attempt to modify this value, some hosting accounts configuration may not allow it to do so.
To disable PHP max_execution_time, add this directive to your PHP INI (php.ini or .user.ini):
max_execution_time = 0
If it does not work, the scanning process may have been killed by your host. NinjaScanner can catch fatal errors and signals, but some hosts will send the SIGKILL signal to terminate immediately the PHP script if it is taking too long. This signal cannot be caught by the scanner or any other application. Ask your host to confirm whether your hosting plan has such limitation.
2. PHP allowed memory size exhausted
This is a very common issue: PHP stopped the script execution because it reached its memory limit defined in your settings or by your host.
In most cases, no error will be written to the scanner’s log because even if NinjaScanner will catch the fatal error, it won’t be able to write the incident to its log: there’s not enough allocated memory to perform that task!
Click on NinjaScanner “Log” tab, enable the “Debug” checkbox below the log’s textarea to increase its verboseness. Search for all lines containing allocated memory such as this one:
23-Oct-18 14:41:10 DEBUG Process used 58,313,056 bytes out of 58,388,608 bytes of allocated memory.
It shows that PHP allocated 58Mb of memory for the scanner execution. (note that this includes memory needed by WordPress, its themes and plugins as well.)
Check your PHP memory limit with the following script:
<?php
header( 'Content-Type: text/plain' );
echo "memory_limit is set to " . ini_get( 'memory_limit' );
?>
If the value returned by the script is close to the one displayed in NinjaScanner’s log, you will probably need to increase it.
To change PHP memory_limit, for instance, to 256 megabytes, add this directive to your PHP INI (php.ini or .user.ini):
; Increase PHP limit to 256 megabytes:
memory_limit = 256M
Then run again the above script to check if the new value has been detected by PHP. If it keeps displaying the old one, wait a few minutes because PHP may take up to 5 minutes before reloading your INI file. But if after a while you still don’t see any changes, contact your host and ask them if you can increase the PHP memory_limit value.
PHP and HTTP server logs
Don’t forget to check your logs! Be it a memory or execution time issue, the error will be written to the server or PHP error log.
- The HTTP error log will be available from your hosting panel.
- You can enable the PHP error log for WordPress by editing your
wp-config.phpscript:
Search for this line:define( 'WP_DEBUG', false );
Replace it with these two lines:
define( 'WP_DEBUG', true );
define( 'WP_DEBUG_LOG', true );
The error log, if any, will be written to
/wp-content/debug.log.
More info about debugging and WordPress: Debugging in WordPress.