This post is about the .htninja configuration file for NinjaFirewall WP Edition. If you’re looking for NinjaFirewall Pro Edition, please consult this post instead.
NinjaFirewall (WP/WP+ Edition) can use an optional configuration file that allows users to prepend their own PHP code to the firewall.
This file must be named .htninja and must be located either:
- In the folder above your website document root:
If your document root is/home/user/public_html/, the location of the file will be/home/user/.htninja.
This is the recommended choice. Because it is located outside the document root, the file is relatively safe and protected. However, if you have an open_basedir restriction, PHP will not be able to access it.
- In the document root folder:
If your document root is/home/user/public_html/, the location of the file will be/home/user/public_html/.htninja.
Recommended only if you have an open_basedir restriction. If you are using the Apache HTTP server, the file is relatively protected because, by default, it will never serve a file whose name starts with.ht*. However, if you are using Nginx or any other HTTP server that doesn’t use .htaccess files, you must set it up so that it will block any access to the file from a web browser.
Any
.htninjadirective will be processed first, even before NinjaFirewall brute-force protection.
NinjaFirewall’s package contains a sample file, named .htninja.sample. It is a regular PHP file. Note that it does not contain a PHP closing tag (?>). We recommend to keep it that way, because if there is a space or new line character after a closing tag, it may trigger errors on your site (PHP would need to send HTTP headers in order to ouput those characters before your website is loaded). This problem does not occur when the PHP closing tag is missing.
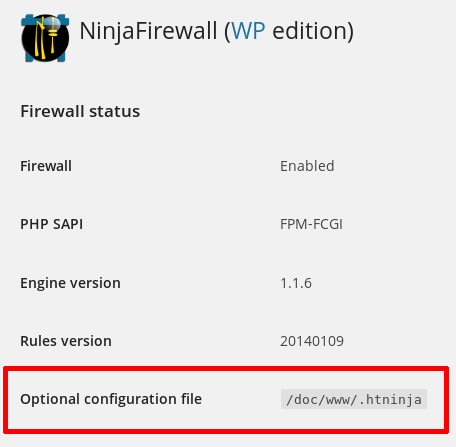
You can check if the .htinja file was detected from your WordPress admin back-end, by clicking on “NinjaFirewall > Dashboard”:
Path to NinjaFirewall’s log and cache directory
By default, NinjaFirewall saves its logs and cached files into a folder named /nfwlog/ located inside the WordPress /wp-content/ directory. If you want to change that path, use the NFW_LOG_DIR constant:
<?php
/*
 +===========================================================================================+
 | NinjaFirewall optional configuration file                                                 |
 |                                                                                           |
 | See: https://blog.nintechnet.com/ninjafirewall-wp-edition-the-htninja-configuration-file/ |
 +===========================================================================================+
*/

// To change NinjaFirewall's log and cache folder
// use the 'NFW_LOG_DIR' constant (no trailing slash needed) :

define('NFW_LOG_DIR', '/foo/bar/somewhere');
In the above example, NinjaFirewall’s log folder would be /foo/bar/somewhere/nfwlog/.
Server variables
You can add/modify server variables in the .htninja file. For instance, if your site is behind a reverse proxy or a load balancer, the visitor real address is likely found in the HTTP_X_FORWARDED_FOR variable and needs to be copied to REMOTE_ADDR:
<?php
/*
 +===========================================================================================+
 | NinjaFirewall optional configuration file                                                 |
 |                                                                                           |
 | See: https://blog.nintechnet.com/ninjafirewall-wp-edition-the-htninja-configuration-file/ |
 +===========================================================================================+
*/

// Reverse proxy:
if (! empty($_SERVER['HTTP_X_FORWARDED_FOR']) &&
 filter_var($_SERVER['HTTP_X_FORWARDED_FOR'], FILTER_VALIDATE_IP) ) {
   $_SERVER['REMOTE_ADDR'] = $_SERVER['HTTP_X_FORWARDED_FOR'];
}
Users of the CDN service Cloudflare can retrieve the HTTP_CF_CONNECTING_IP variable:
<?php
/*
 +===========================================================================================+
 | NinjaFirewall optional configuration file                                                 |
 |                                                                                           |
 | See: https://blog.nintechnet.com/ninjafirewall-wp-edition-the-htninja-configuration-file/ |
 +===========================================================================================+
*/

// Users of Cloudflare CDN:
if (! empty($_SERVER["HTTP_CF_CONNECTING_IP"]) &&
 filter_var($_SERVER["HTTP_CF_CONNECTING_IP"],FILTER_VALIDATE_IP)) {
   $_SERVER["REMOTE_ADDR"] = $_SERVER["HTTP_CF_CONNECTING_IP"];
}
Users of the Incapsula CDN service should use the HTTP_INCAP_CLIENT_IP variable instead:
<?php
/*
 +===========================================================================================+
 | NinjaFirewall optional configuration file                                                 |
 |                                                                                           |
 | See: https://blog.nintechnet.com/ninjafirewall-wp-edition-the-htninja-configuration-file/ |
 +===========================================================================================+
*/

// Users of Incapsula CDN:
if (! empty($_SERVER["HTTP_INCAP_CLIENT_IP"]) &&
 filter_var($_SERVER["HTTP_INCAP_CLIENT_IP"], FILTER_VALIDATE_IP) ) {
   $_SERVER["REMOTE_ADDR"] = $_SERVER["HTTP_INCAP_CLIENT_IP"];
}
Users of NinjaFirewall (WP+ Edition) can perform the same task from the “Access Control > Source IP” menu option rather than using the
.htninjafile.
Giving NinjaFirewall a MySQLi link identifier (NinjaFirewall >=3.7.1)
In “Full WAF” mode, because it works before WordPress is loaded, NinjaFirewall needs to read your wp-config.php in order to find and use the database credentials (it cannot use the include() or require() functions because that would load the core part of WordPress). If you have a complex DB setup that NinjaFirewall is not able to properly retrieve, you can give it a MySQLi link identifier in the .htninja.
Two variables are required:
$GLOBALS['nfw_mysqli']: the MySQLi link identifier.$GLOBALS['nfw_table_prefix']: the database prefix.
<?php
/*
 +===========================================================================================+
 | NinjaFirewall optional configuration file                                                 |
 |                                                                                           |
 | See: https://blog.nintechnet.com/ninjafirewall-wp-edition-the-htninja-configuration-file/ |
 +===========================================================================================+
*/
// Connect to the DB and store the link into "$GLOBALS['nfw_mysqli']":
$GLOBALS['nfw_mysqli'] = new mysqli( 'hostname', 'db_user', 'db_password', 'db_name', 'db_port' );
// We need the table prefix too:
$GLOBALS['nfw_table_prefix'] = 'wp_';
You can check if the link was detected from your WordPress admin console, in the “NinjaFirewall > Dashboard” menu:

ALLOW / BLOCK
It is possible to use NinjaFirewall special return values ALLOW and BLOCK in order to blacklist or whitelist anything you want:
ALLOWandNFW_UWL: the firewall will accept the request immediately and will not filter it.BLOCK: the firewall will block the request (403 Forbidden) and close the connection immediately.
This is the fastest way to allow or block a request because it will be processed before WordPress is loaded and even before NinjaFirewall loads its own configuration. Note that, for this reason, the firewall will not write the event to its log.
For instance, we ask the firewall to allow IP 1.2.3.4:
<?php
/*
 +===========================================================================================+
 | NinjaFirewall optional configuration file                                                 |
 |                                                                                           |
 | See: https://blog.nintechnet.com/ninjafirewall-wp-edition-the-htninja-configuration-file/ |
 +===========================================================================================+
*/

if ( $_SERVER["REMOTE_ADDR"] == '1.2.3.4' ) {
   define('NFW_UWL', true);
   return 'ALLOW'; // whitelist
}
If you whitelist your IP using the
.htninja, NinjaFirewallLive Logfeature will not work.
Allow IPv4 1.1.1.1, 2.2.2.2 and IPv6 2001:4998:c:a06::2:4008:
<?php
/*
 +===========================================================================================+
 | NinjaFirewall optional configuration file                                                 |
 |                                                                                           |
 | See: https://blog.nintechnet.com/ninjafirewall-wp-edition-the-htninja-configuration-file/ |
 +===========================================================================================+
*/

$ip_array = array( '1.1.1.1' , '2.2.2.2' , '2001:4998:c:a06::2:4008' );
if ( in_array( $_SERVER["REMOTE_ADDR"], $ip_array ) ) {
   define('NFW_UWL', true);
   return 'ALLOW'; // whitelist
}
Allow all IPs from 1.1.1.1 to 1.1.1.255:
<?php
/*
 +===========================================================================================+
 | NinjaFirewall optional configuration file                                                 |
 |                                                                                           |
 | See: https://blog.nintechnet.com/ninjafirewall-wp-edition-the-htninja-configuration-file/ |
 +===========================================================================================+
*/

if ( preg_match( '/^1\.1\.1\.\d+$/', $_SERVER["REMOTE_ADDR"] ) ) {
   define('NFW_UWL', true);
   return 'ALLOW'; // whitelist
}
To block or allow IPv4 CIDR (e.g., 1.1.1.1/24) or custom IP ranges, see this discussion and that one on the WordPress.org forum.
To reject, use the BLOCK return value instead:
<?php
/*
 +===========================================================================================+
 | NinjaFirewall optional configuration file                                                 |
 |                                                                                           |
 | See: https://blog.nintechnet.com/ninjafirewall-wp-edition-the-htninja-configuration-file/ |
 +===========================================================================================+
*/

if ( $_SERVER["REMOTE_ADDR"] == '1.2.3.4' ) {
   return 'BLOCK'; // reject it
}
Users of NinjaFirewall (WP+ Edition) can whitelist or blacklist IPs from the “Access Control > IP Access Control” menu option rather than using the
.htninjafile.
To allow any access to a PHP script located inside the /foo/bar/ directory:
<?php
/*
 +===========================================================================================+
 | NinjaFirewall optional configuration file                                                 |
 |                                                                                           |
 | See: https://blog.nintechnet.com/ninjafirewall-wp-edition-the-htninja-configuration-file/ |
 +===========================================================================================+
*/

if (strpos($_SERVER['SCRIPT_FILENAME'], '/foo/bar/') !== FALSE) {
   define('NFW_UWL', true);
   return 'ALLOW';
}
Advanced Filtering
The .htninja.sample included in NinjaFirewall package shows some advanced filtering samples, for instance, blocking a POST request if it contains a whatever variable sent to a PHP script named script.php:
<?php
/*
 +===========================================================================================+
 | NinjaFirewall optional configuration file                                                 |
 |                                                                                           |
 | See: https://blog.nintechnet.com/ninjafirewall-wp-edition-the-htninja-configuration-file/ |
 +===========================================================================================+
*/

// Block immediately a POST request if it contains a 'whatever' variable
// sent to a script named 'script.php' :
if ( isset($_POST['whatever']) && strpos($_SERVER['SCRIPT_NAME'], 'script.php') !== FALSE ) {
   return 'BLOCK';
}