Revision: April 17, 2023
In this article we will see how to provide a very high level of protection to a WordPress blog with a web application firewall: NinjaFirewall (WP Edition).

Because it has a lot of options, policies and some very advanced features – and even undocumented ones as well, NinjaFirewall is understandably intimidating to people who aren’t familiar with security applications. Indeed, it’s a complicated software, but security is a complicated matter. If you can’t afford to spend a couple of hours to learn it, it is highly unlikely you will ever be able to properly secure your WordPress blog. But if you are ready to spend some time to understand how to configure it and to get the best out of it, this article is for you.
Note that I will cover only the free version of NinjaFirewall, the WP Edition, which is available in the wordpress.org repo, because the premium WP+ Edition has a lot of additional features and it would be too confusing to introduce both editions in the same article.
How does it work?
Even before using it, it is important to understand how it works. When a visitor or an attacker comes to your site, this is what happens if NinjaFirewall is installed:
Visitor -> HTTP server -> PHP interpreter -> NinjaFirewall #1 -> WordPress (or any PHP script) -> NinjaFirewall #2 -> Plugins & Themes -> WordPress exit -> NinjaFirewall #3
NinjaFirewall has three parts:
- NinjaFirewall #1
This is the most important one, the WAF – or Web Application Firewall. It works before your blog is loaded. When a request hits that part, WordPress does not even know that someone is visiting your site. Not yet.
This part uses several hundred rules (300+) and customisable policies (50+) and will block all threats such as SQLi, XSS, RCE attempts etc. But it is also the heart of “Sensei”, NinjaFirewall’s powerful filtering engine. It is used to normalize and transform data from incoming HTTP requests, to decode, detect and deobfuscate evasion techniques used by hackers to bypass web application firewalls. This is a very complex and extensive topic that is beyond the scope of this article, but if you want to learn more about it, consult this article: An introduction to NinjaFirewall filtering engine.
- NinjaFirewall #2
This is the part of the firewall that works at the WordPress level. It will do some pretty much conventional things such as sending you an alert when someone logs in to your admin dashboard, but it will also perform some interesting actions, for instance, detecting when a hacker is trying to get administrator privileges (more about that later).
- NinjaFirewall #3
Right before exiting, PHP will give control back to NinjaFirewall so that it will check and modify your HTTP headers and cookies in order to secure them. In the premium WP+ Edition, it will also load the “Web Filter”, a feature very similar to the ModSecurity’s “SecResponseBodyAccess” directive, which is very useful if you want to identify errors, hacked content and data leakage issues in the response body sent to your visitors.
All three independent parts can communicate with one another.
I could also add a fourth one to the list: the “.htninja”. It is to NinjaFirewall what the “.htaccess” is to the Apache HTTP server. You can add any PHP code to that file and it will be loaded and executed by the firewall before its own code. This is a very powerful feature for advanced users. More info can be found in this article: The .htninja configuration file.
Requirements
- WordPress version 4.7+.
- PHP version 7.1+.
- MySQL or MariaDB with MySQLi extension.
- Apache, Nginx, LiteSpeed/Openlitespeed compatible webserver.
- Unix-like operating systems only (Linux, *BSD etc). NinjaFirewall is not compatible with Microsoft Windows.
- Administrator/Superadmin with
manage_options+unfiltered_htmlcapabilities.
Installation
NinjaFirewall can be installed in two different modes: Full WAF or WordPress WAF. “Full WAF” is the mode you should select because the level of protection is the highest you can get for WordPress. “WordPress WAF” should be selected only if your server is not compatible with “Full WAF”.
It has an installer that makes the installation process relatively straightforward. For help, take the time to consult its blog and its forum on wordpress.org. There’s even a Troubleshooter script.
Restriction
- In a multi-site environment, NinjaFirewall settings are only available to the Superadmin. You cannot change that.
- In a single-site installation, all Administrators can access the firewall settings. If you want to change that, consult this article: Restricting access to NinjaFirewall (WP Edition) settings.
Configuration Backup / Export / Import
In case of problems, you can restore your previous configuration from the “Firewall Options > Configuration backup” section:
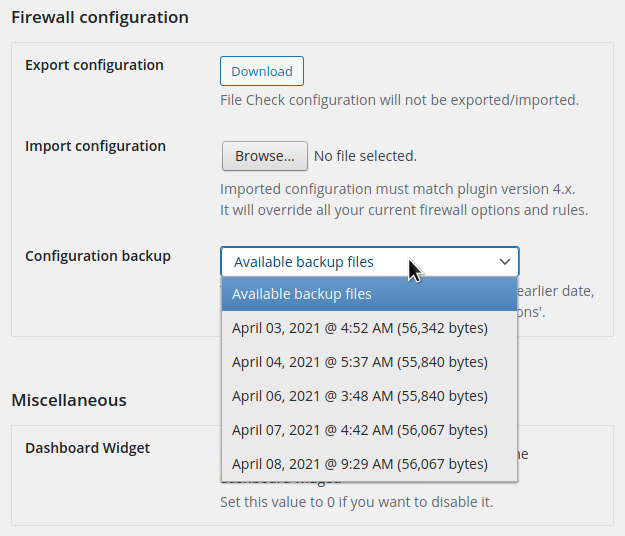
There’s also a configuration import/export feature that comes in handy if you have many sites: you can configure one site, export and then import the configuration to all your sites.
Configuration
This is the longest part of the article: How to configure NinjaFirewall, step by step. There’s a lot to write about it but don’t forget to consult its contextual help too, which is available on each page:
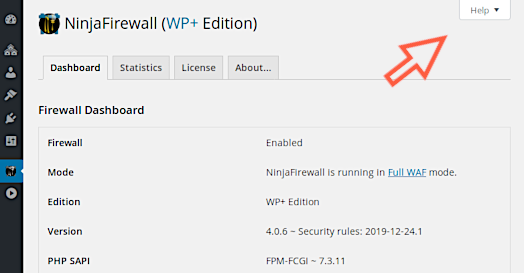
NinjaFirewall > Dashboard
The “Dashboard” page is a very important place because any potential warning or error will be printed there. Therefore, always keep an eye on it (and on the Firewall Log too).
NinjaFirewall > Firewall Options
NinjaFirewall is a powerful firewall. When implemented in a production environment, it does not take more than a few hours before its log starts showing several blocked threats. But if you wrongly configure it, you can also block some legitimate visitors! To prevent this, it has a very helpful option, the “Debugging Mode”:
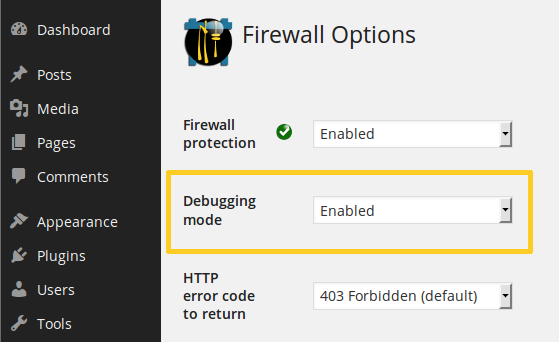
When this mode is enabled, NinjaFirewall will silently run in the background without blocking anyone, but it will keep writing all potential threats to the firewall log as usual.
When running in “Debugging Mode”, your site is not protected by the firewall.
I recommend to enable the “Debugging Mode” as soon as you install NinjaFirewall on a new site or each time you make some important changes to its configuration, and to keep it enabled for at least 24 hours while checking the Firewall Log regularly. If you notice some false positives in the log, you can simply disable the corresponding security rule or policy.
As soon as everything is fine, don’t forget to disable the “Debugging Mode”.
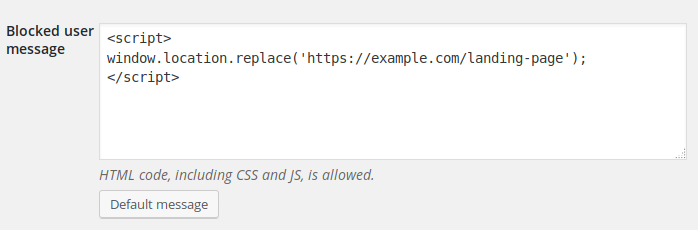
The options page lets you configure the message that will be returned to a blocked user:
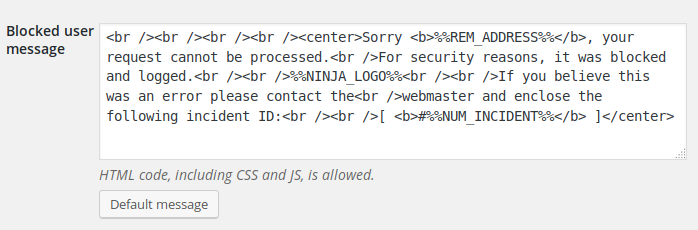
If you want to use a nice landing page, create one and replace NinjaFirewall’s default message with JavaScript code to redirect to it:
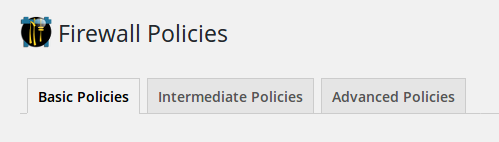
NinjaFirewall > Firewall Policies
NinjaFirewall has a lot of policies. They are split into three parts, “Basic Policies”, “Intermediate Policies” and “Advanced Policies”:
You don’t need to save your changes before switching to another tab. You can switch back and forth between the three tabs, change options and then click the “Save Firewall Policies” button afterwards.
One thing important to understand is that you, the Administrator, are whitelisted by default by the firewall. That means that when you enable a policy, it won’t apply to you, as long as you are logged in (except WordPress three built-in constants and the HTTP response headers).
All policies can be restored to their default values by clicking the “Restore Default Values” button.
Basic Policies
- HTTP/HTTPS:
You can select whether you want NinjaFirewall to filter your HTTP and/or HTTPS traffic. Unless you know what you are doing, you should enable both.
- File Uploads:
This option lets you handle uploads. If only you, the whitelisted Administrator, need to upload files, you should disable uploads for obvious security reasons. Unlike the premium WP+ Edition, the free edition of NinjaFirewall has only two options, allow or disallow uploads. However, it still has some undocumented safeguards such as spoofed MIME-type protection: If hackers attempted to upload a PHP script and to fake its MIME-type, for instance,Content-Type: image/gif(GIF image) orContent-Type: application/pdf(Adobe PDF file), NinjaFirewall would detect and reject it right away, even if you allow uploads. Here’s an example of a spoofed MIME-type attempt caught by the firewall:25/Feb/18 17:47:49 #1102887 CRITICAL - 71.13.112.152 POST /index.php - Blocked file upload attempt (MIME-type mismatch) - [awwac.php != image/gif]
When uploads are enabled, you can also ask the firewall to sanitise the name of the uploaded file: Any character that is not a letter
a-zA-Z, a digit0-9, a dot., a hyphen-or an underscore_will be removed from the filename and replaced with the substitution character, which you can define as well (its default value isX). If you are using non-Latin characters, it is better not to sanitise filenames.
- Block direct access to any PHP file located in one of these directories:
I recommend to keep the default values, because there is no reason to directly access a PHP script located in those folders, including/wp-content/uploads/.
- Block attempts to modify important WordPress settings:
This policy will prevent non-admin users from changing some important options in WordPress (e.g., enabling user registration, changing the website URL etc). It will also send you a notification by email with all details. If you take into consideration that, lately, there have been several vulnerabilities in plugins that allowed hackers to change WordPress options, you’ll understand why this policy is a life saver.
- Block user accounts creation:
If you don’t allow user registration, I recommend to enable this policy: it will block any attempt (e.g., exploiting a vulnerability, using a backdoor etc) to create a user account. Only you, the admin, will be allowed to create accounts. The incident will be written to the firewall log and a notification will be sent to you by email.
- Block user accounts deletion:
It will block any attempt (e.g., exploiting a vulnerability, using a backdoor etc) to delete a user account. Only you, the admin, will be allowed to delete accounts. The incident will be written to the firewall log and a notification will be sent to you by email.
- Block attempts to gain administrative privileges:
This policy is extremely efficient to block 0-day vulnerabilities that could be leveraged by attackers to gain administrative privileges in order to compromise the whole blog. Note that when a privilege escalation attempt is detected, it will be blocked and a notification will be sent to you by email.
- Block attempts to publish, edit or delete a published post by users who do not have the right capabilities:
This policy will block vulnerabilities that could be leveraged by attackers to create, edit or delete posts. Note that it applies topostandpagepost types only (not to custom ones). It is very efficient to block important zero-day vulnerabilities that could allow an attacker to inject code into existing pages or posts, such as the critical Avada Theme vulnerability we disclosed on May 2020. I recommend to enable this policy.
- WordPress AJAX – Protect admin-ajax.php against suspicious bots:
Lately, a lot of plugin vulnerabilities were exploited via theadmin-ajax.phpscript. When enabling this policy, NinjaFirewall will try to detect and get rid of malicious bots trying to access it. Because WordPress and several plugins need to accessadmin-ajax.php, your server IP as well as all private IP addresses won’t be blocked. I recommend to enable this policy because it can really help to block bots trying to exploit zero-day vulnerabilities. As usual, blocked attempts will be written to the firewall log:20/Apr/19 04:25:40 #1455373 MEDIUM - 178.132.0.251 GET /wp-admin/admin-ajax.php - Blocked access to admin-ajax.php - [bot detection is enabled]
- Protect against username enumeration:
Username enumeration is not a vulnerability but a WordPress feature that some hackers use to retrieve registered usernames in order to launch more accurate brute-force attacks. NinjaFirewall can block four different types of username enumeration techniques. None of them are enabled by default. Note that enabling them on a blog that has been live for several weeks or months is unlikely going to help because hackers may already have built a list of all usernames available on that blog!For better security, consider using strong passwords and enabling NinjaFirewall’s brute-force attacks protection.
- Through the author archives:
This option will prevent access to the author archives page. Note that NinjaFirewall will not block the request but will invalidate it and redirect the user to the blog index page. The reason is that search engines such as Google may try to index that page and it is better to nicely redirect them rather than returning a 403 Forbidden message and closing the connection. - Through the login page:
When attempting to log in with a wrong username, WordPress will return that the user does not exist (“Invalid username”), and when attempting to log in with a wrong password, it will return that the password is not correct, hence confirming that the user exists or not. If you enable this policy, NinjaFirewall will force WordPress to return a “Invalid username or password” message instead, so that it will no longer be possible to check the validity of a username. - Through the blog feed:
All usernames will be removed from the feed. - Through the WordPress REST API:
This policy addresses users enumeration through the REST API (/wp-json/wp/v2/users). Unless the request comes from a logged in user that has thelist_userscapability, it will be blocked immediately.
- Through the author archives:
- WordPress REST API & XML-RPC API:
This set of policies applies to the two APIs used by WordPress: the XML-RPC API, and the newer REST API. Because both of them are used by several plugins (Jetpack, Contact Form 7 etc) and external applications such as mobile apps, none of those policies are enabled by default. If you want to enable them anyway, don’t forget to activate the Debugging Mode and to keep an eye on the firewall log to make sure that legitimate applications aren’t blocked.
- Block POST requests in the themes folder /wp-content/themes:
This policy can be used to prevent hackers from directly exploiting potential 0-day vulnerabilities in the themes folders. However, a few themes could be blocked if that option was enabled (it isn’t, by default).
- Disable Application Passwords:
The Application Passwords feature was introduced in WordPress 5.6. If you don’t need it, consider disabling it.
- Force SSL for admin and logins (FORCE_SSL_ADMIN):
This options will only allow access to the admin dashboard over HTTPS. Make sure that HTTPS is enabled before activating this option or you may lock yourself out of the site!
If you want to force access to the whole site over HTTPS, consider also enabling the Strict-Transport-Security header from the “Advanced Policies > HTTP response headers” section.
- Disable the plugin and theme editor (DISALLOW_FILE_EDIT):
This policy will disable the built-in theme and plugin editor which can be accessed by clicking on “Plugins > Editor” and “Appearance > Editor”. When hackers gain access to the WordPress dashboard, they often use the editor to backdoor some PHP scripts. I recommend to activate this option so that no one could use the editor.For security reasons, you cannot edit NinjaFirewall’s files with the plugin editor, even if you are the Admin/Superadmin.
- Disable plugin and theme update/installation (DISALLOW_FILE_MODS):
This option will block users being able to use the plugin and theme installation/update functionality from the WordPress admin area. Setting this constant also disables the plugin and theme editor. Note that NinjaFirewall can notify you when a theme or plugin is installed (see the Event Notifications section).
- Disable the fatal error handler (WP_DISABLE_FATAL_ERROR_HANDLER):
This option will disable the fatal error handler that was introduced in WordPress 5.2.
Unlike other security plugins, NinjaFirewall does not write the FORCE_SSL_ADMIN, DISALLOW_FILE_EDIT, DISALLOW_FILE_MODS and WP_DISABLE_FATAL_ERROR_HANDLER constants to your wp-config.php. Instead, and due to the way it works, it will define them in memory and WordPress will inherit them while loading.
Intermediate Policies
Here comes the good part, the “Intermediate Policies” page. This is where you will define how you want NinjaFirewall to deal with PHP superglobals (GET, POST, COOKIE etc). It can perform two actions: block and/or sanitise.
- Block: If NinjaFirewall detects a threat, it will block it and will close the connection immediately, without loading WordPress. It can’t be simpler (and quicker).
- Sanitise: If NinjaFirewall detects a potentially dangerous request, it will not block but sanitise it instead. This action will be performed when the filtering process is over, right before NinjaFirewall forwards the request to your PHP script. This applies to some specific characters that could be used to exploit SQL injection, cross-site scripting or remote code execution vulnerabilities for instance. Those 12 characters are:
',",\,\n,\r,`,\x1a,\x00,*,?,<and>. However, this action is in fact more complex than it seems:- It will not apply to the value of a variable only, but to its name as well, i.e.,
index.php?variable_name=variable_value. - It will not sanitise the variable name and value the same way.
- Depending on the request, potentially dangerous characters can be replaced, removed or escaped.
- It will not sanitise all superglobals the same way. For instance, COOKIE, GET and PATH_INFO will be sanitised differently.
- It will not apply to the value of a variable only, but to its name as well, i.e.,
These two actions can be combined together to make your blog even more secure.
All that may be a bit difficult to understand at first, but in the following examples, we’ll see exactly how and when to use them depending on the level of security you want to achieve. Note that the policies default values are, in my opinion, already well tweaked for most blogs and keeping them as they are will give you a very good level of security.
The PHP_SELF, PATH_TRANSLATED and PATH_INFO sanitise action policies can be setup in the Advanced Policies section.
HTTP GET variable
- Scan GET variable:
As you want to block dangerous GET requests, this option must be kept enabled. It will block a lot of threats.
- Sanitise GET variable:
By default, the firewall will not sanitise GET and I don’t really recommend to enable it if you don’t know what you are doing. It can be compared to a “low-level paranoia mode”, which would be very efficient to prevent 0-day exploits, but it is not suitable for all blogs. If you want to enable it anyway, don’t forget to activate the Debugging Mode and to keep an eye on the firewall log to make sure there is no false positives.
HTTP POST variable
- Scan POST variable:
As with the “Scan GET variable” option, this one should be kept enabled and will block a lot of threats.
- Sanitise POST variable:
This option should not be enabled. It would sanitise any POST payload, and might even lock you out of your site (if your password contains one of the 12 characters to sanitise, you won’t be able to log in). You may probably wonder why does this option exist if you can’t use it? NinjaFirewall WP Edition uses the same code – and WAF engine – as the Pro Edition, which is a generic version for all PHP applications. A simple PHP site protected by the Pro Edition could have this “high-level paranoia mode” enabled for maximum security without any problem, but what is suitable for a simple site isn’t for a complex CMS like WordPress.
- Decode Base64-encoded POST variable:
This is a great feature: NinjaFirewall can detect, decode and scan Base64-encoded injection in the POST payload. Here’s an example:12/Feb/18 16:12:14 #2570164 CRITICAL 2001:41d0:a:4205:: POST /index.php - BASE64-encoded injection - [POST:sort = cHJpbnQobWQ1KDMyNDIzNCkpOw==]
It shows that
cHJpbnQobWQ1KDMyNDIzNCkpOw==, which decodes toprint(md5(324234));, was detected and blocked by the firewall. If you take into consideration that most backdoors use base64-encoded data, you can understand why this option is a life saver and you should keep it enabled!
HTTP REQUEST variable
- Sanitise REQUEST variable:
Do not enable this option, for the same reason as with “Sanitise POST variable”.
Cookies
- Scan cookies:
There have been many cookie-based vulnerabilities in WordPress plugins, therefore you should keep this option activated.
- Sanitise cookies:
By default this option is disabled. Although enabling it shouldn’t be an issue on a vanilla WordPress install, some third-party plugins or themes could behave erratically if the data they save to a cookie contained characters that require to be sanitised. As usual, if you want to enable this feature, don’t forget to activate the Debugging Mode and to keep an eye on the firewall log.
HTTP_USER_AGENT server variable
- Scan HTTP_USER_AGENT:
The HTTP_USER_AGENT is often used by plugins that will either display it to the user or save it to the database. This could lead to XSS and SQLi vulnerabilities. Keeping this option enabled is a must.
- Sanitise HTTP_USER_AGENT:
For the same reason indicated above, this option should be kept enabled.
- Block suspicious bots/scanners:
This option will block a lot of bots even before they start messing with your site. You really don’t want to disable it, do you? Don’t worry about good bots such as Google, Yahoo!, Bing and others, they won’t be blocked.
HTTP_REFERER server variable
- Scan HTTP_REFERER:
This is a good example of “block” vs “sanitise” action: By default, NinjaFirewall will never block visitors based on their HTTP_REFERER. The reason is that someone could click on a link redirecting to your site from a page whose name may contain sub-strings or keywords that the firewall could mistakenly consider as a threat. Your visitor would be blocked. Chances are low, but must be taken into consideration. For this reason, it is disabled by default.
- Sanitise HTTP_REFERER:
Because it doesn’t scan the HTTP_REFERER (see above), NinjaFirewall will still sanitise it by default because it is a user input, and thus it can’t be trusted. I recommend to keep this feature enabled.
- Block POST requests that do not have an HTTP_REFERER header:
This is another option that I don’t recommend to activate on WordPress. As indicated, “Keep this option disabled if you are using scripts like Paypal IPN, WordPress WP-Cron etc“, it will likely block legitimate requests unless you whitelist those scripts (in the free WP Edition, you will need to use the .htninja file and, in the WP+ Edition, you can do that from the “Access Control > URL Access Control > Allow access to the following URL” menu).
IP
- Block localhost IP in GET/POST request:
This option will block some SQL dumpers and various shell scripts that hackers try to install on a compromised website. There’s no reason to disable it.
- Block HTTP requests with an IP in the HTTP_HOST header:
Many bots and vulnerability scripts scan IP addresses rather than domain names. Enabling this option will block them right away. If you need to connect to your site using its IP address (e.g., http://1.2.3.4/blog/), you should keep it disabled, obviously.
- Scan traffic coming from localhost and private IP address spaces:
A lot of security plugins will not scan traffic coming from a private network, and that’s a huge mistake. It is not unusual for a webserver to get compromised after hackers gained access to another server on its network. By default, NinjaFirewall will scan this traffic too and unless you have some specific reasons, you should not disable it.Note that this policy includes the loopback interface (localhost) as well. It is just for development purpose, i.e., if you want to test NinjaFirewall on your local machine before going live.
Advanced Policies
This part handles the advanced policies. Be careful when making changes as you could do more harm than good. If you are unsure, leave the default values.
HTTP response headers
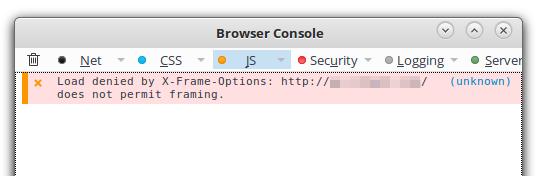
This is a very specific section because, unlike other policies, the HTTP response headers are executed client-side, not server-side. That means that NinjaFirewall will send the selected HTTP header along with the response body to the visitor’s browser which will act accordingly (block or sanitise the content or redirect the request for instance). It is important to note that because it is client-based, events will not be written to the firewall log, therefore if you suspected you were blocked by a header, the only way to be sure of that would be to consult your browser console (your browser will not display any warning, error message or pop-up alert in your HTML page).
On most browsers, you’ll need to press the CTRL + Shift + J keys to open it. Here’s an example of Firefox console showing that the request to load an iframe was blocked because the X-Frame-Options header was set:
HTTP headers policies apply to all whitelisted users, including the Admin/Superadmin. NinjaFirewall’s Debugging Mode has no effect on them either.
- Set X-Content-Type-Options to protect against MIME type confusion attacks:
This header will send thenosniffvalue to instruct the browser to disable content or MIME sniffing and to use the content-type returned by the server. Some browsers try to guess (sniff) and override the content-type by looking at the content itself which, in some cases, could lead to security issues such as MIME Confusion Attacks.
- Set X-Frame-Options to protect against clickjacking attempts:
This header indicates a policy whether a browser must not allow to render a page in a<frame>or<iframe>. Hosts can declare this policy in the header of their HTTP responses to prevent clickjacking attacks, by ensuring that their content is not embedded into other pages or frames.SAMEORIGIN: a browser receiving content with this header must not display this content in any frame from a page of different origin than the content itself.DENY: a browser receiving content with this header must not display this content in any frame.If your site does not require to load a content in a frame, enabling this option could be very useful to protect you, the logged in Administrator, from clickjacking or phishing attacks.
- Set X-XSS-Protection (
IE/Edge,Chrome,Opera andSafari browsers):
This header allows browsers to identify and block XSS attacks by preventing malicious scripts from executing. It is enabled by default on all compatible browsers.This header is deprecated. Consider using Content-Security-Policy (CSP) below.
If a visitor disabled their browser’s XSS filter, you cannot re-enable it with this header.
- Force SameSite flag on all cookies to mitigate CSRF attacks:
Adding this flag to cookies helps to mitigate the risk of CSRF attacks (cross-site request forgery) because cookies can only be sent in requests originating from the same origin as the target domain.Strict: If a same-site cookie has this attribute, the browser will only send cookies if the request originated from the website that set the cookie. If the request originated from a different URL than the URL of the current location, none of the cookies tagged with theStrictattribute will be included.Lax: If the attribute is set to Lax, same-site cookies are withheld on cross-site subrequests, such as calls to load images or frames, but will be sent when a user navigates to the URL from an external site, for example, by following a link.
- Force HttpOnly flag on all cookies to mitigate XSS attacks:
Adding the HttpOnly flag to cookies helps to mitigate the risk of cross-site scripting by preventing them from being accessed through client-side scripts. NinjaFirewall can hook all cookies sent by WordPress, its plugins or any other PHP script, add the HttpOnly flag if it is missing, and re-inject those cookies back into your server HTTP response headers right before they are sent to your visitors. This header is not enabled by default because some themes or plugins may need to access cookies from JavaScript.Note that WordPress sets that flag on your authentication cookies upon login.
- Set Strict-Transport-Security (HSTS) to enforce secure connections to the server:
This policy enforces secure HTTPS connections to the server. Web browsers will not allow the user to access the web application over insecure HTTP protocol. It helps to defend against cookie hijacking and Man-in-the-middle attacks.
You can define the duration value (1 month, 6 months or 1 year) and whether it should apply to your sub-domains as well. If your site (front-end and back-end) should only be accessed over HTTPS, consider enabling this option.
Note that this policy will be grayed out if you aren’t accessing your site over HTTPS.
- Set Content-Security-Policy:
This policy helps to mitigate threats such as XSS, phishing and clickjacking attacks. It covers JavaScript, CSS, HTML frames, web workers, fonts, images, objects (Java, ActiveX, audio and video files), and other HTML5 features. NinjaFirewall lets you configure the CSP policy separately for the front-end and the back-end (WordPress admin dashboard).
Content-Security-Policy is a much more efficient and reliable header than the X-XSS-Protection, but it is complicated to implement in WordPress due to the large number of scripts, links, HTML forms, style sheets and media files your site may be using. However, I really recommend you take some time to understand it, in order to implement it at least in the back-end section as it can offer some pretty good protection to you, the Admin/Superdamin. Some good additional documentation can be found on the developer.mozilla.org and developers.google.com websites.
- Set Referrer-Policy (Chrome, Opera and Firefox browsers):
This header governs which referrer information, sent in the Referer header, should be included with requests made.
PHP
- Block PHP built-in wrappers in GET, POST, HTTP_USER_AGENT, HTTP_REFERER and cookies:
Hackers can used PHP wrappers to attempt to bypass firewalls and to exploit remote and local file inclusions. NinjaFirewall will detect and block the following wrappers:expect://,file://,phar://,php://,zip://anddata://. I recommend to keep this policy enabled.Although it is undocumented, this policy will also block data URI schemes that can be used to exploit cross-site scripting (XSS) vulnerabilities.
- Block serialized PHP objects in the following global variables:
Object Serialization is a PHP feature used by many applications to generate a storable representation of a value but, if wrongly used, it could also lead to a critical type of vulnerability called PHP Object Injection.
By default, this option will block serialized PHP objects found in GET, POST, HTTP_USER_AGENT and HTTP_REFERER variables. Keep them enabled because PHP Object Injection has become a very common type of vulnerability among WordPress plugins lately.
Regarding COOKIE, it is not enabled by default because there could be a few plugins or themes that store serialized PHP objects in cookies and your visitors could be blocked (and that would mean that your plugin or theme is vulnerable to cookie-based PHP Object Injection!). If you want to enable it too, which I recommend, don’t forget as usual to activate the Debugging Mode and to keep an eye on the firewall log.
- Block attempts to override PHP Superglobals:
This policy will block attempts to override superglobals (_GET,_POST,_COOKIE,_SESSION,_SERVER,_FILES,_ENV,_REQUESTandGLOBALS). A plugin or a theme could make an unsafe use of some PHP functions that could potentially override superglobals. Enabling this option will not block the request but unset the dangerous value and write the event ot the firewall log. I recommend to enable this policy.
- Hide PHP notice and error messages:
This options lets you hide errors returned by your scripts. Such errors can leak sensitive informations to hackers. Keep it enabled, unless you want to debug your PHP scripts. Note that WordPress has a set of constants that can be used to hide or show error messages too: Debugging in WordPress.
- Sanitise PHP_SELF:
This policy will sanitise the PHP_SELF server variable and it is a good idea to keep it enabled (see the above Intermediate Policiessection for more info about the “Sanitise” action).
- Sanitise PATH_TRANSLATED:
Same as above.
- Sanitise PATH_INFO:
Same as above.
Various
- Block the DOCUMENT_ROOT server variable in HTTP request:
Because hackers use shell scripts that often need to pass the DOCUMENT_ROOT value inside a GET or POST request, I recommend to keep this policy enabled.
- Block ASCII character 0x00 (NULL byte):
This policy will reject any GET or POST request, HTTP_USER_AGENT, REQUEST_URI, PHP_SELF, PATH_INFO, HTTP_REFERER variables containing the ASCII character 0x00 (NULL byte). Such a character is dangerous and should always be rejected. Keep it enabled.
- Block ASCII control characters 1 to 8 and 14 to 31:
This policy will reject any GET or POST request, HTTP_USER_AGENT and HTTP_REFERER server variables containing ASCII characters from 1 to 8 and 14 to 31. Those characters are:
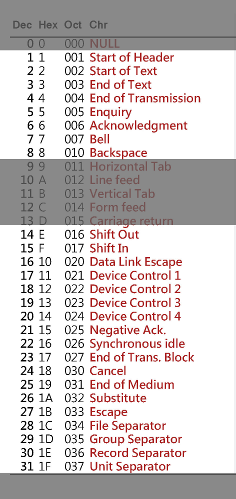
If you want to enable it, don’t forget to activate the Debugging Mode and to keep an eye on the firewall log to make sure that legitimate applications aren’t blocked.
NinjaFirewall > Monitoring > File Guard
This is another great – and totally unique – feature of NinjaFirewall: real-time monitoring.
Let’s assume the following scenario: Hackers gain access to your FTP account and use it to upload a /backdoor.php script among your blog files. Then, they access it with their browser and start messing with your site.
If you have enabled File Guard, when hackers will access the backdoor you will receive this email notification immediately:
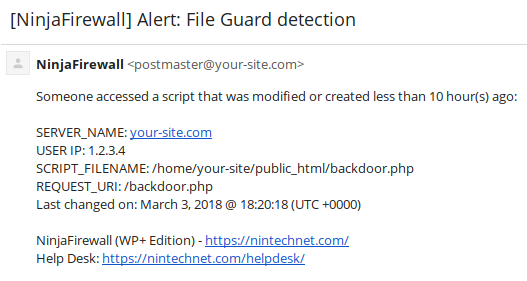
NinjaFirewall detected that someone “accessed a script that was modified or created less than 10 hours ago“. When a visitor accesses a PHP script, the firewall hooks the request in real time and, before serving the file, checks when it was created or last modified. In the above example, it detected that it was created less than 10 hours ago, thus it sent the notification immediately. Because of the way NinjaFirewall works, this feature is unique to it and you won’t find it in any other plugins.
You can change “10 hours” to any other value. I recommend to set it to “24 hours”.
Note that if you updated WordPress, you could receive a few notifications too, for instance, if a visitor accessed a core file that was just updated (e.g., index.php, wp-cron.php, admin-ajax.php etc).
Email notifications are sent once only: if someone accessed one hundred times the same script, you would receive one notification only.
File Guard is a true life saver and you should consider enabling it.
NinjaFirewall > Monitoring > File Check
File Check lets you perform file integrity monitoring upon request or on a specific interval, via WordPress pseudo-cron, WP-Cron. First, you create a snapshot of all files on your website and then you set it up to run at a regular interval – hourly, twice daily or daily. It will detect any changes made to your files and will send you an email notification with the list of modifications. That means that it is not only useful to detect hacking attempts, but it can be used to track file and folder changes made by your developers as well (it doesn’t hurt to keep an eye on that, does it?).
Although there are already many security plugins that have a similar feature, I recommend to use NinjaFirewall File Check for at least two good reasons:
- File Check is faster than other plugins. Run performance benchmarks and you will see the speed difference.
- File Check offers a better detection: most security plugins rely only on hashes. That’s fine to detect content modification but what about if hackers changed your files permission or ownership? They wouldn’t detect it. File Check would.
If you are using a caching plugin, don’t forget to add its cache folder to the exclusion list before creating the first snapshot (by default, the list already contains NinjaFirewall’s own cache, /wp-content/nfwlog/), otherwise you will receive a lot of notifications because cached files will be created, modified or deleted often. If you already created the snapshot, delete it, add your files/folders to the exclusion list and create a new snapshot.
When exporting NinjaFirewall’s configuration, File Check settings will not be exported because, when re-importing them to a new site, those changes would trigger an alert.
NinjaFirewall > Anti-Malware
Since version 3.6, the Anti-Malware feature has been replaced by a brand new plugin: NinjaScanner. Consult its documentation.
NinjaFirewall > Event Notifications
This section handles notifications: users login, plugin and theme installation, the daily activity report etc. I recommend to keep at least the default values enabled.
Some of the most important ones are:
- Send me an alert whenever an administrator logs in.
- Send me an alert whenever an administrator account is created, modified or deleted in the database.
- Send me an alert whenever an important security update is available for a plugin, theme or WordPress.
- Send me a daily activity report.
- Attach a PHP backtrace to important notifications: This feature, introduced in v3.8.3, will attach a PHP backtrace to the following email notifications:
- When NinjaFirewall has blocked an attempt to create a user account.
- When NinjaFirewall has blocked an attempt to gain administrative privileges.
- When NinjaFirewall has blocked an attempt to modify some important WordPress settings by a user that does not have administrative privileges.
I really recommend to keep it enabled because if your scripts were backdoored, the backtrace would show you all information needed to locate the malicious code, e.g., the script name, all the function/method arguments and even the line number! For more information about this cool feature: NinjaFirewall (WP Edition) adds PHP backtrace to email notifications.
By default, notifications are also written to the firewall log so that if you lost the notitication email, you could still consult the log.
You can configure NinjaFirewall to send event notifications to one or more email addresses.
NinjaFirewall > Login Protection
This is the cherry on the cake: the brute-force protection.
When it comes to protect your login page, NinjaFirewall doesn’t beat the competition hands down, in fact, it doesn’t have any competition at all. See for yourself: WordPress brute-force attack detection plugins comparison.
By default, it will return an average of 600 bytes of data only and, as usual, will shut down the connection without loading WordPress or the database. Unbeatable! And don’t worry if you are facing a distributed attack, it will handle it too.
Setting up the brute-force protection can be a bit confusing because there are a lot of available options and possible combinations. First of all, you must select how you want to enable it. Choose preferably “Always ON” so that it is always up and running. Then, you must select the type of protection: password or captcha.
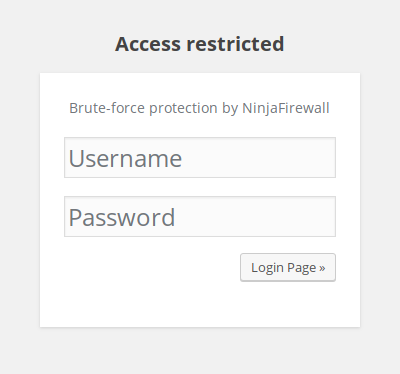
- Password protection
If you select this option, you will need to define an additional username and password (don’t use your WordPress login name and password!) that will be required each time you want to access the login page. Here’s what the form looks like:
- Captcha protection
If you select this option, each time you want to access the login page you will get… a captcha form to fill in:

The captcha is not case-sensitive: It’s not a password, it can’t be cracked, reversed or decrypted, and it can’t even be subject to brute-force attacks (every failed attempt would generate a new captcha).
However, the image shows uppercase and lowercase letters in order to make it more difficult for a bot to read it.
You can change the captcha font: get a True Type Font file, name it “font.ttf” and drop it inside the
/wp-content/nfwlog/folder!
Which one should you use?
If you are the only person to log in, the password protection is your best choice. It blocks brute-force attacks and also give you an additional authentication layer. If you have a handful of trusted users, you can share the brute-force protection username/password with them too, that’s not really a problem. However, if you have many subscribers, the captcha protection is likely the easiest and less intrusive protection because it might be too tedious to share the credentials with all of them.
The Login Protection page has a few other options, among them:
- Enable bot protection:
Similarly to the Block suspicious bots/scanners firewall policy, the purpose of this feature is to kick out bots even before they start a brute-force attack. And it works rather well! This option is enabled by default and I really recommend to keep it enabled. Here’s an example of the firewall log showing brute-force scanners getting jammed as soon as they arrive:
19/Feb/18 08:09:56  #5154788  MEDIUM -  91.200.12.28  GET /wp-login.php - Blocked access to the login page - [bot detection is enabled]
19/Feb/18 08:09:56  #7612408  MEDIUM -  91.200.12.28  GET /wp-login.php - Blocked access to the login page - [bot detection is enabled]
19/Feb/18 08:47:48  #3696436  MEDIUM -  66.249.73.19  GET /wp-login.php - Blocked access to the login page - [bot detection is enabled]
- Write the incident to the server Authentication log:
This is an interesting feature if you have your own server, e.g., VPS or dedicated, and are using Fail2ban to block IP addresses with the server firewall. When it detects a brute-force attack, NinjaFirewall can write the offender’s IP to the server authentication log (/var/log/auth.logor/var/log/securedepending on your distro) so that Fail2ban can retrieve it and add it to the list of blocked IPs:
# grep ninjafirewall /var/log/auth.log
Aug 31 01:40:35 www ninjafirewall[6191]: Possible brute-force attack from 172.16.0.1 on mysite.com (wp-login.php). Blocking access for 5mn.
Aug 31 01:45:28 www ninjafirewall[6192]: Possible brute-force attack from fe80::6e88:14ff:fe3e:86f0 on blog.domain.com (XML-RPC API). Blocking access for 25mn.
There is a discussion on wordpress.org about how to setup Fail2ban with NinjaFirewall. Don’t forget also to consult NinjaFirewall’s contextual help as it contains more details about the log format.
Obviously, if you are on a shared hosting account, you cannot use this option.
You must set up the login protection to “Yes, if under attack” if you want to write the incident to the server Authentication log. If you set it up to “Always ON”, NinjaFirewall will block all incoming requests without checking whether it is an attack or not and thus will not record the incident.
If you lost your password, consult this page to reset it.
NinjaFirewall > Logs > Firewall Log
The log is undoubtedly one the most essential parts of a firewall. All events, threats, hacking attempts and various information will be written to it. Here’s what it looks like:
       DATE         INCIDENT  LEVEL    RULE      IP          REQUEST
12/Mar/18 06:28:17  #2777291  CRITICAL 1017  5.188.10.105    GET /index.php - Apache Struts2 remote code execution CVE-2017-5638 - [SERVER:CONTENT_TYPE = %{(#_='multipart/form-data').(#dm=@ognl.OgnlContext@DEFAULT_MEMBER_ACCESS).(#_memberAccess?(#_memberAccess=#dm):((#container=#context['com.opensymphony.xwork2.ActionContext.conta...]
13/Mar/18 05:11:08  #4548578  CRITICAL  319  81.2.195.242    GET /index.php - Obfuscated data - [GET:product_id = 459 or (1,2)=(select*from(select name_const(CHAR(111,108,111,108,111,115,104,101,114),1),name_const(CHAR(111,108,111,108,111,115,104,101,114),1))a) -- and 1=1]
13/Mar/18 05:11:07  #1721117  CRITICAL    2  81.2.195.242    GET /index.php - ASCII character 0x00 (NULL byte) - [GET:product_id = 459%00'||SLeeP(3)&&'1]
13/Mar/18 20:45:18  #3155431  CRITICAL  259  92.61.155.10    GET /index.php - SQL injection - [GET:product_id = 45999999' union select unhex(hex(version())) -- 'x'='x]
13/Mar/18 20:45:18  #8164741  CRITICAL  259  92.61.155.10    GET /index.php - SQL injection - [GET:product_id = 45999999" union select unhex(hex(version())) -- "x"="x]
14/Mar/18 21:18:40  #1281993  HIGH        -  2a01:4f8:c0c:1b0a::2   GET /wp-includes/class-walker-nav-menu.php - Forbidden direct access to PHP script - [/wp-includes/class-walker-nav-menu.php]
16/Mar/18 16:34:07  #8165712  MEDIUM      -  80.93.124.54    GET /wp-login.php - Blocked access to the login page - [bot detection is enabled]
16/Mar/18 16:35:03  #7236718  MEDIUM      -  103.81.207.10   GET /wp-login.php - Blocked access to the login page - [bot detection is enabled]
16/Mar/18 16:35:37  #4740310  MEDIUM    306  137.74.162.138  GET /index.php - Bogus user-agent signature - [SERVER:HTTP_USER_AGENT = Mozilla/4.0 (compatible; MSIE 6.0; Windows NT 5.1]
16/Mar/18 16:35:38  #5398673  MEDIUM    306  137.74.162.138  GET /index.php - Bogus user-agent signature - [SERVER:HTTP_USER_AGENT = Mozilla/4.0 (compatible; MSIE 6.0; Windows NT 5.1]
16/Mar/18 16:38:10  #6087427  MEDIUM      -  201.6.231.196   GET /wp-login.php - Blocked access to the login page - [bot detection is enabled]
16/Mar/18 17:37:58  #3605226  MEDIUM    306  113.251.41.5    GET /index.php - Bogus user-agent signature - [SERVER:HTTP_USER_AGENT = Mozilla/4.0 (compatible; MSIE 6.0; Windows NT 5.1)]
16/Mar/18 18:09:10  #6837246  HIGH      310  54.152.92.50    GET /index.php - Access to a configuration file - [GET:img = ../wp-config.php]
16/Mar/18 18:04:20  #5801255  CRITICAL    1  94.23.31.164    HEAD /index.php - Directory traversal - [GET:qqfile = /../../helpars.php]
16/Mar/18 18:09:11  #4172256  CRITICAL    -  54.152.92.50    POST /index.php - Attempt to upload a script or system file - [tnx.php (10,303 bytes)]
16/Mar/18 21:32:52  #5796834  CRITICAL    -  94.23.35.132    POST /index.php - BASE64-encoded injection - [POST:z0 = QGluaV9zZXQoImRpc3BsYXlfZXJyb3JzIiwiMCIpO0BzZXRfdGltZV9saW1pdCgwKTtAc2V0X21hZ2ljX3F1b3Rlc19ydW50aW1lKDApO2VjaG8oIi0+fCIpOzskRD1kaXJuYW1lKCRfU0VSVkVSWyJTQ1JJUFRfRklMRU5BTUUiXSk7ZWNobyAkRC4iXH...]
17/Mar/18 08:52:06  #1853753  MEDIUM      -  112.83.13.95    GET /wp-login.php - Blocked access to the login page - [bot detection is enabled]
17/Mar/18 00:26:30  #2784565  HIGH      310  74.208.211.146  GET /wp-admin/admin-ajax.php - Access to a configuration file - [GET:img = ../wp-config.php]
17/Mar/18 00:26:30  #5964712  CRITICAL    1  74.208.211.146  GET /index.php - Directory traversal - [GET:fileName = ../../../../../../../../../../etc/passwd]
17/Mar/18 00:26:30  #8905689  CRITICAL    1  74.208.211.146  GET /index.php - Directory traversal - [GET:filename = ../../../../../../../../../etc/passwd]
17/Mar/18 05:23:53  #4111835  CRITICAL  260  58.218.200.115  GET /index.php - SQL injection - [GET:SmallClass = ' union select 0,username+CHR(124)+password,2,3,4,5,6,7,8,9 from admin union select * from news where 1=2 and ''=']
It is important to keep an eye on it on a daily basis, so that you know exactly what’s going on. It might also reveal potential false positives. You’ll have to solve them, if any.
Unlike the WP+ Edition which includes a lot of options such as log rotation, syslog logging or filtering, there is nothing to configure in the WP Edition log page except centralized logging (but this too requires at least a WP+ or Pro+ license on the master site).
The log is rotated monthly and you can view older ones by selecting them from the drop-down menu. Note that if the log is too large, NinjaFirewall will warn you and will only display the last 1500 lines.
The firewall logs are stored in the
/wp-content/nfwlog/folder. They are never deleted, not even when you uninstall NinjaFirewall.
NinjaFirewall > Logs > Live Log
Live Log lets you watch your blog traffic in real time, just like the Unix tail -f command, and can be quite useful. It has a lot of options but none are related to the firewall behaviour, therefore I’m not going to cover them. As usual, consult the contextual help for more details about them.
NinjaFirewall > Security Rules > Rules Update
This option will check and update the firewall security rules automatically (hourly, twice daily or daily). I stress on the fact that only the firewall rules will be updated, not NinjaFirewall core which can be updated just like any other plugins – from your WordPress admin dashboard – when a new version is available.
By default this option is activated and you should not disable it. Make sure also to select “Hourly” because if there were a critical vulnerability in WordPress or one of its plugins or themes, new security rules would be made available immediately so that your blog could download them and be protected within the next few minutes or so.
NinjaFirewall > Security Rules > Rules Editor
If you notice that your visitors are wrongly blocked by one of the 300+ security rules, you can use the Rules Editor to disable it. Check its contextual help for more details.
Recommendations
If you’re still reading, congratulations!
To end this article, here are a couple of recommendations:
- Always use the Debugging Mode for a couple of hours after installing NinjaFirewall or right after making important changes to make sure everything is working as expected.
- Keep an eye on the firewall log on a daily basis to see what is going on with your blog.
- Keep an eye on the Dashboard page from time to time to ensure there is no error or warning messages.
- Don’t disable important notifications. They can be useful to detect hacking attempts or any kind of weird activities.
- Make sure you understand what a policy does before enabling or disabling it. If you’re unsure, ask for help in the NinjaFirewall support forum (or the Help Desk if you have a premium license).
- RTFM: Don’t forget to consult the contextual help available on each page.
Happy Firewalling!